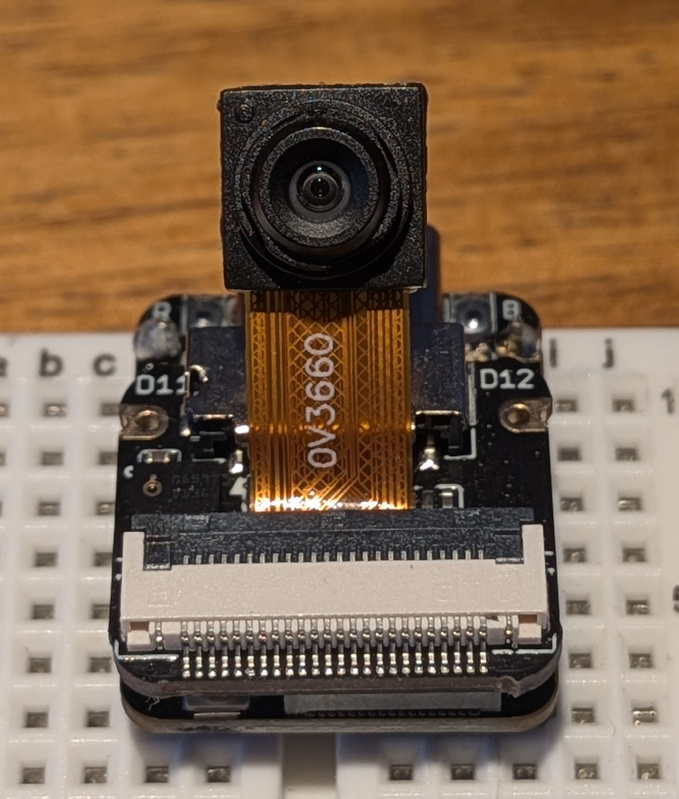
ESP32-S3
In Windows
In the start menu type "device manager" and select device manager when it displays in the search results. Navigate to "communication devices".
install firmware
Standard micropython firmware does not work with the camera hardware out of the box. Fortunately there is community support on github. Navigate to: https://github.com/cnadler86/micropython-camera-API/releases/#release-v0.6.0.
You specifically want the XIAO_ESP32S3 image. The direct link is here: https://github.com/cnadler86/micropython-camera-API/releases/download/v0.6.0/mpy_cam-v1.27.0-XIAO_ESP32S3.zip
I have pinned to v0.6.0 rather than the latest, because v0.6.1-v0.6.2 have a problem with the jpeg codec.
Download and unzip the firmware to your project folder.
Flash your device
Note: Thonny has UI bugs that prevent it from always letting you select your own images that you've pre-downloaded. For that reason we have to use the command line tool:
Linux
Navigate to your project folder and run:
#esptool --port <PORTNAME> erase-flash
esptool --port /dev/ttyACM0 erase-flash
esptool --port /dev/ttyACM0 --baud 460800 write-flash 0 firmware.bin
Windows
- Navigate to your project folder.
- Activate your environment, if necessary.
-
Erase the flash first. Paste the following into the terminal, using the com port you noted in device manager in place of
COMX.esptool.exe --port <COMX> erase_flash -
next, load the micropython firmware
esptool.exe --port <COMX> --baud 460800 write_flash 0x1000 firmware.binsubstituting
<path-to-the-micropython-bin-file>for the path the micropython binary is downloaded ot. For example, assuming you downloaded the micropython binary to yourDownloadsfolder, you could use:esptool.exe --port COMX --baud 460800 write_flash 0x1000 $HOME\Downloads\firmware.bin
Code
This firmware is built off micropython v1.27, which means that the Pymakr VSCode extension will not work well. We will thus be using thonny for this exercise
Set up Thonny
Right click in your file explorer on requirements.txt (or any other file in your project folder) and select "Open In teriminal". Type thonny at the command prompt (or thonny.exe in windows)
If this is your first time running thonny, Select your language and "Let's Go" on the splash screen
Select the options menu from the main menu. Click on the interpreter tab. In the drop down menu, select Micropython (ESP32). Select the appropriate serial port for your device. Click OK on the dialog box to accept your changes.
Now that you've selected the appropriate interpreter and port, the terminal window should say "micropython v1.27" (or similar)
from camera import Camera, GrabMode, PixelFormat, FrameSize, GainCeiling
Load prerequisites
We will be installing one or two prerequisites, including
-
microdot: https://github.com/miguelgrinberg/microdot/tree/main/src
If you are using existing MicroPython libraries, these usually reside inside a MicroPython-based device in
lib/<projectname>. -
Download the zip files from each of the above library links, and unzip them into your project folder.
-
Construct a folder structure matching the one below in your project folder
lib/microdot/__init__.py: create a new blank file with this namemicrodot.py: copy this from the microdot zip'ssource/microdot/folder
-
In the terminal at the bottom of the Thonny window, type:
import os os.makedir('lib') os.makedir('lib/microdot') -
Create a new file and paste in the contents of the above
lib/microdot/microdot.pyfile. typectrl+shift+s, and then "on my micropython device". select the lib/microdot folder and then save asmicrodot.py - Create a new file and paste in the contents of the above
lib/microdot/__init__.pyfile. typectrl+shift+s, and then "on my micropython device". select the lib/microdot folder and then save as__init__.py -
Create a new file and paste in the following contents. type
ctrl+shift+s, and then "on my micropython device". select the top level folder and then save asmain.pyimport asyncio import ubinascii import microdot.microdot as microdot import network import esp esp.osdebug(None) import gc gc.collect() ssid = '<YOUR WIFI SSID>' password = '<YOUR WIFI PASSWORD>' station = network.WLAN(network.STA_IF) station.active(True) station.connect(ssid, password) while station.isconnected() == False: pass print('Connection successful') print(station.ifconfig()) from camera import Camera, GrabMode, PixelFormat, FrameSize, GainCeiling cam = Camera( pixel_format=PixelFormat.JPEG, frame_size=FrameSize.QQVGA, # frame_size=FrameSize.P_HD, jpeg_quality=75, fb_count=2, grab_mode=GrabMode.LATEST ) app = microdot.Microdot() @app.route('/') async def index(request): return 'Hello, world!' html_template = '''<html><body><img src="data:img/jpeg;base64,{img_bytes}"></body> </html> ''' @app.route('/pic') async def pic(request): img_bytes = bytes(cam.capture()) img_enc = ubinascii.b2a_base64(img_bytes) html = html_template.format(img_bytes=img_enc.decode('utf-8')[:-1]) return html, 202, {'Content-Type': 'text/html'} async def main(): server = asyncio.create_task(app.start_server(port=80)) await server asyncio.run(main()) -
Make sure to replace
<YOUR WIFI SSID>and<YOUR WIFI PASSWORD>with your home wifi ssid and password - type
ctrl+sto re-save the file
Run the code
- In the terminal window, type
ctrl+d. - Wait for the device to connect. It will report its own ip address once connected (the first term, like
192.168.0.245) - Navigate in your browser to that address (e.g.
http://192.168.0.245). It should displayHello World. - Next, add
/picto the address (e.g.http://192.168.0.245/pic). This should display an image from the camera.
External Resources
- micropython camera firmware: https://github.com/cnadler86/micropython-camera-API/
- key for resolution codes: https://en.wikipedia.org/wiki/Display_resolution_standards
- microdot: