ESP32 Setup
Introduction
What you will need
- Your computer set up according to the previous tutorial
- An ESP32 WROOM DevKit or ESP32-S3 Devkit*
- USB-A to micro Cable
* Please see my notes on differences between the ESP32-WROOM and the ESP32-S3 Devkits
It is important to use a high-quality data transfer USB cable for this tutorial. The Pymakr VSCode plugin is extremely useful but buggy. Using a poor cable will increase your chances of failed transfers.
Find your Device
Windows
-
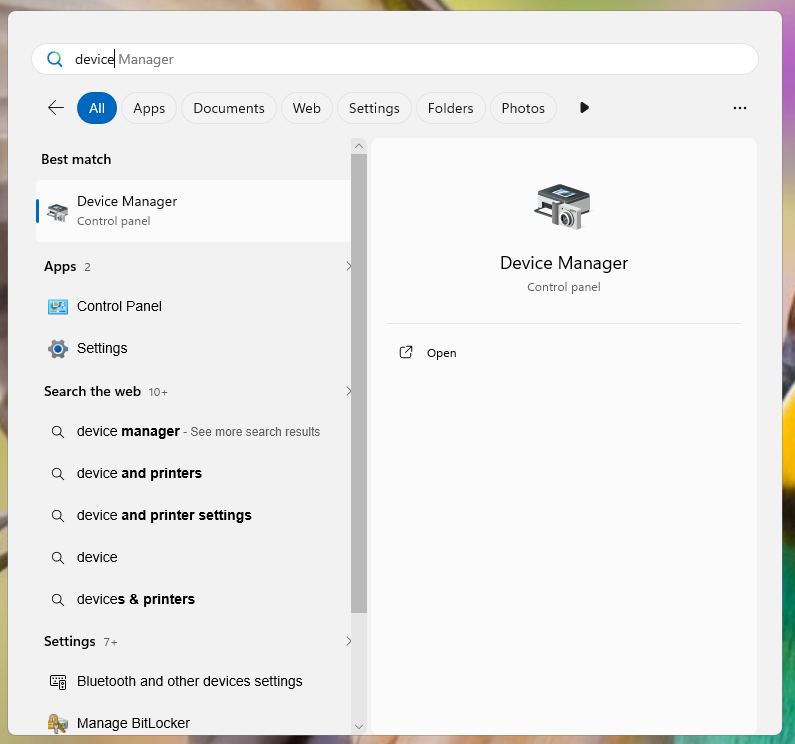
Search for "Device Manager" in the Start Menu
-
In the list search for the "Other Devices" heading, and look for something like "CP210X USB to UART Bridge Controller". If you find this, you need to install the driver. Proceed to the next section, "Install the CP210X Python Driver"
-
If, on the other hand, you don't see an "Other Devices" heading but instead find a "Ports (COM & LPT)" Heading with a "USB Serial Device (COM X)":
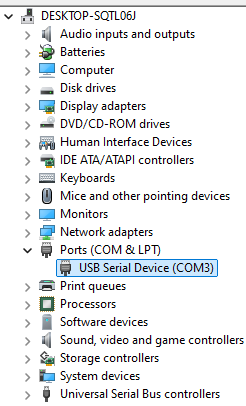
Then note the COM port listed and proceed to the "Load Micropython on the ESP32" section.
In Linux
in linux, plug your esp32 into your computer's USB port and immediately run in a new terminal:
sudo dmesg
This should output a stream of recent system messages. You should see output related to the new USB device. The following lines are all associated with the event of detecting a new USB device when it was plugged in. Note the last line with ttyACM0:
[3052666.581278] usb 1-3.1.3: new full-speed USB device number 57 using xhci_hcd
[3052667.085295] usb 1-3.1.3: New USB device found, idVendor=303a, idProduct=4001, bcdDevice= 1.00
[3052667.085301] usb 1-3.1.3: New USB device strings: Mfr=1, Product=2, SerialNumber=3
[3052667.085302] usb 1-3.1.3: Product: Espressif Device
[3052667.085304] usb 1-3.1.3: Manufacturer: Espressif Systems
[3052667.085306] usb 1-3.1.3: SerialNumber: 1cdbd4744c800000
[3052667.094737] cdc_acm 1-3.1.3:1.0: ttyACM0: USB ACM device
if you type
ls /dev/tty*
You should see the same ttyACM0 listed. This is the path to your new USB connection to the ESP32.
Common Names often found include
/dev/ttyACM0,/dev/ttyACM1,/dev/ttyUSB0,/dev/ttyUSB1
(WINDOWS ONLY) Install the CP210X Python Driver
Note: In Windows 11 it is quite likely that you do not have to install the CP201X Driver. This section has been added in case you ever need to fix the driver.
-
Download the SiLabs CP210X drivers. Navigate to:
https://www.silabs.com/software-and-tools/usb-to-uart-bridge-vcp-drivers?tab=downloads
and download the windows driver: https://www.silabs.com/documents/public/software/CP210x_Universal_Windows_Driver.zip
-
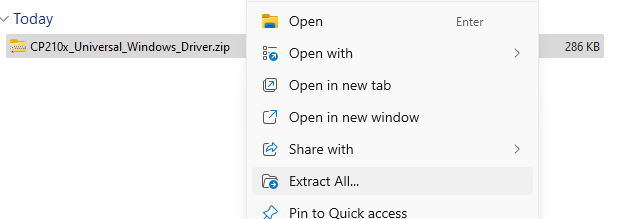
Unzip the zip file and note the folder
-
-
Connect the ESP32 to your computer via USB
-
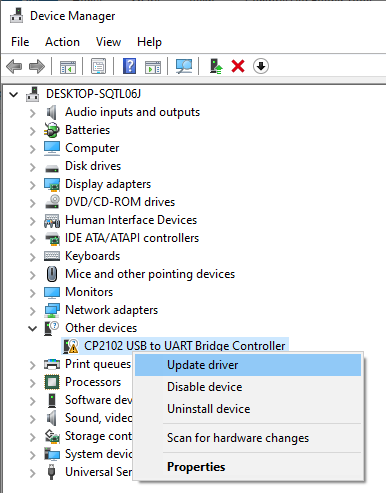
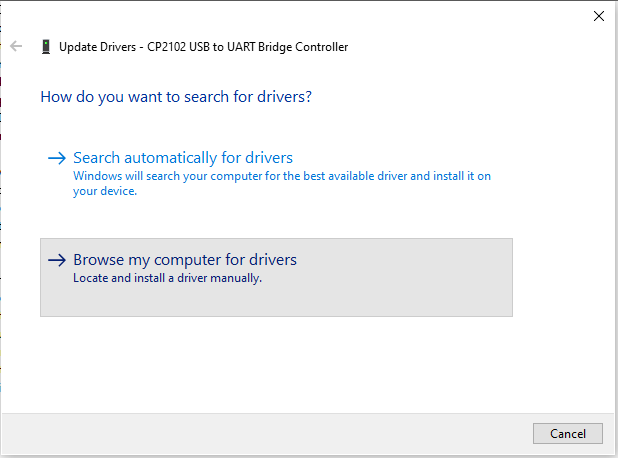
Open Device Manager. Scroll down to "Other Devices" and find the device listed as "CP210X USB to UART Bridge Controller". Right click on it and select "update driver"
-
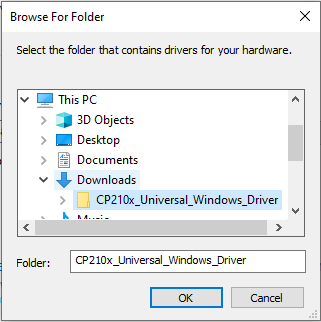
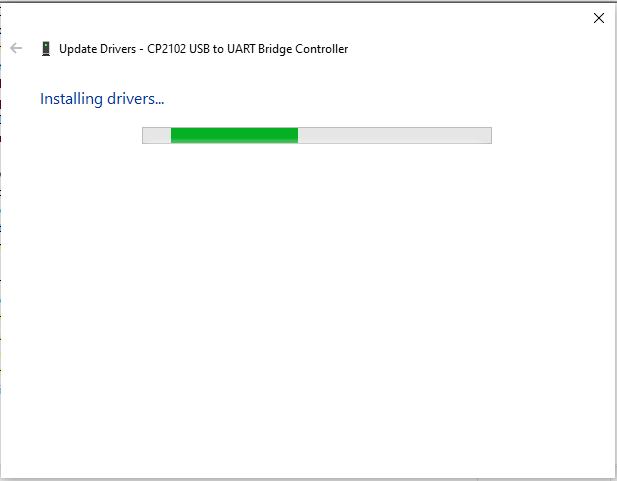
Navigate to the driver folder you unzipped, find the CP210x_Universal_Windows_Driver subfolder, and click "ok".
-
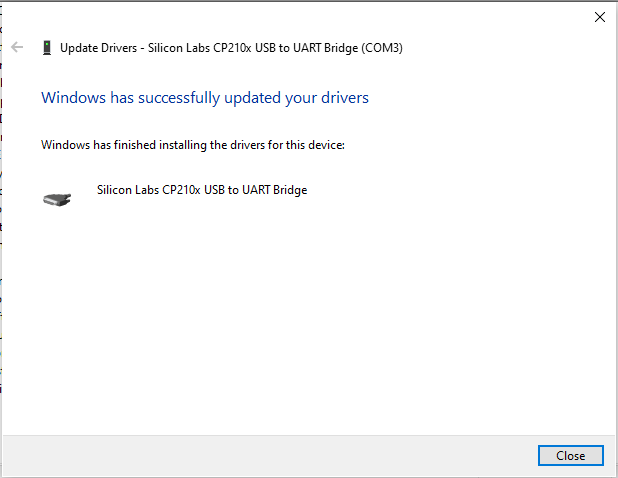
Once the install is complete, scroll up in device manager to "Ports (COM & LPT)" and select "USB Serial Device (COM X)". Note the COM port of the device
Load Micropython on the ESP32
-
Go to https://micropython.org/download/ESP32_GENERIC/, scroll down to the firmware and download the bin file for v1.24.1: https://micropython.org/resources/firmware/ESP32_GENERIC-20241129-v1.24.1.bin
Note: we are downloading an older version of micropython because pymakr is incompatible with newer versions. v1.24.1 is the most recent version that is compatible.
-
Open your project folder in VSCode. Right click on any file in your project's file explorer and select "open in integrated terminal"
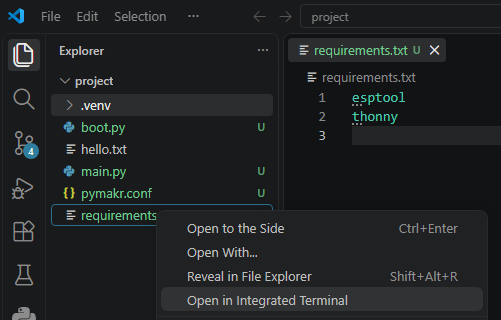
Another Note: Thonny has UI bugs that prevent it from always letting you select your own images that you've pre-downloaded. For that reason we have to use the terminal in VSCode.
-
(Windows Only) You will be prompted whether to run the shell integration:
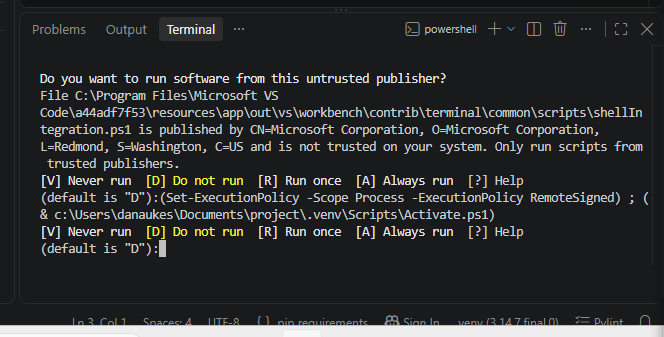
- select
A - type
.venv\Scripts\activate.ps1and then typeAto allow the python activation script to always load
- select
-
Erase the flash first.
In Windows, paste the following into the terminal, using the com port you noted in device manager in place of
COMX.esptool.exe --port COMX erase_flashIn Linux, paste the following into the terminal, using the device port you noted in
dmesginstead of/dev/ttyACMX.esptool --port /dev/ttyACMX erase_flash -
next, load the micropython firmware
-
Windows Only: In Windows, paste the following into the terminal, using the com port you noted in device manager in place of
COMX, and substituting<path-to-the-micropython-bin-file>for the path the micropython binary is downloaded to. For example, assuming you downloaded the micropython binary to yourDownloadsfolder, you could use:Note: Only Run the command that matches your device
ESP32-WROOM:
esptool.exe --port COMX --baud 460800 write_flash 0x1000 <path-to-the-micropython-bin-file>ESP32-S3:
esptool.exe --port COMX --baud 460800 write_flash 0 <path-to-the-micropython-bin-file> -
Linux Only: In Linux, paste the following into the terminal, using the device port you noted in
dmesginstead of/dev/ttyACMX, and substituting<path-to-the-micropython-bin-file>for the path the micropython binary is downloaded to. For example, assuming you downloaded the micropython binary to yourDownloadsfolder, you could use:Note: Only Run the command that matches your device
ESP32-WROOM:
esptool --port /dev/ttyACMX --baud 460800 write_flash 0x1000 <path-to-the-micropython-bin-file>ESP32-S3:
esptool --port /dev/ttyACMX --baud 460800 write_flash 0 <path-to-the-micropython-bin-file>
-
Install Python Packages
Follow the steps in the "Create a Virtual Environment" section of the previous tutorial to create a virtual python environment if you haven't already.
Create a New PyMakr Project
- Inside your
intelligent-product-designproject folder, create a new subfolder calledproject-01-hello-world - Follow the steps here to create a new PyMakr Project in that folder.